The following is an email (with the subject line reading “Fun <not>”) that Jim recently sent to a couple of friends. It details all the fun he DIDN’T have once we got back from our Spring travels. It was too good not to share with all our techy friends. The words are Jim’s, I tossed in the pictures and captions. Jim, take it away….
This is a very long email, so wait until you can sit back, relax, have a beverage (wink, wink) and absorb.
I’ve been pretty quite since we got back as I’ve been up to my a** in alligators.
About a week before we got home Corinne got up to go to the bathroom one night. “Jim, the 12 volt power is off.” Panic sets in. Display shows State of Charge (SOC) of 0%. Panic sets in deeper. Checked various things on the control panel. No joy. Pull out the emergency backup. We have a key fob that forces the computer controlling the battery pack into charge mode. Fire up the generator. Relief. The battery starts charging.
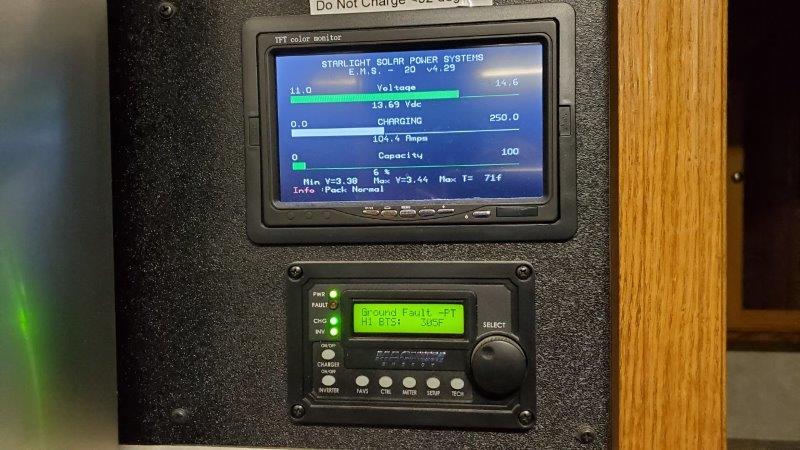
Charge rate is about 100A. 500A battery so five hours to charge, 20% per hour, so every couple minutes should get another 1%. Doing just that. Then 45 minutes later the battery is at 100%. What the !@*$*&*????
To condense a little, after numerous calls and emails we found out that if there is a fault that trips the computer, it resets SOC to 0%. Then as it charges, it realizes when it reaches 100% because the current drops and the voltage stabilizes, so then it re-calibrates to 100%. So our battery wasn’t really at 0%, just reported it that way. And we reached 100% in 45 min because we were actually starting from a SOC of more than 80%. Whew, all makes sense now. On our display we can read faults and fault history. A ground fault of the solar charger was reported. Talking to the installer he said they had found these to be false reports. So he had me reset dip switches in the solar charger to prevent this. Feeling good.
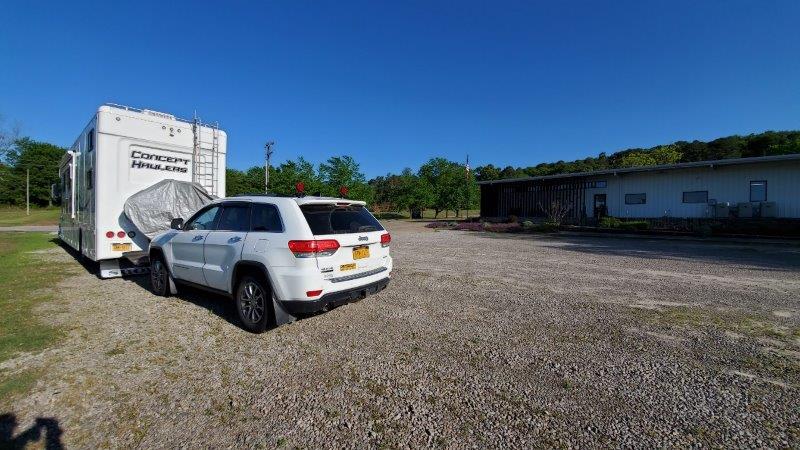
So the last morning out we are at a Harvest Host winery. I get up to shave, half way through the 12V power goes out again. Mild panic. Go through the emergency restart, battery starts charging. A short time later it fails again. Restart again. A little while later is fails again. Enough. Shut the entire 12V system down. We were going to be home that day, the weather was cold so no fridge concerns. Fire up the truck and hit the road.
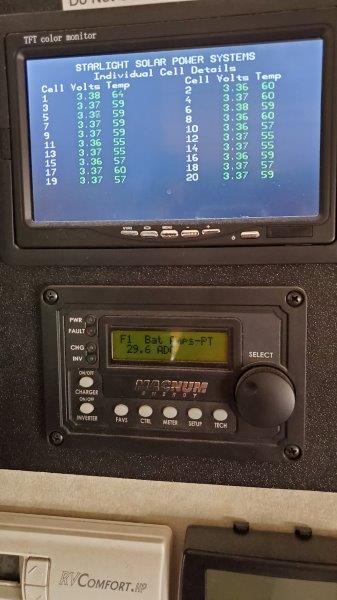
Condense once again. Many calls/emails and the diagnosis is the sense boards on the individual cells are having a problem. But it is probably only one of them. But which one out of 20? On my main display I can toggle it to give data on the individual cells. When will it fail? No problem. We put the dash camera on the fridge and point it at the display. Now when it fails we will have a video record and we can pinpoint the cell. At the same time I open the battery compartment and check all the connections, inspect for anything visually obvious, etc.
So now what? It doesn’t fail. Grrrr!!! So I try different conditions. We had freezing temperatures naturally so that was checked. Put a heater in the compartment and got everything hot. The installer had me reprogram the charge profile to stress the system and various other changes. Nothing. Nothing. Nothing. System working as it should. Of course every one of the tests took a day or two as the batteries had to go through charge/discharge cycles to exercise them as if in use. Slow and frustrating.
What to do? I could replace all the sense boards (Note: none of them are visible, the entire compartment would have to be disassembled to replace the boards and then reassembled, HUGE job). $600 for parts. I was leaning toward this until he told me how to override the system if a failure occurred again, with the proviso that I would have to control/monitor the charging manually as the computer would be inoperable. OK, feeling a little better, if it would fail at least we would have 12V and could limp somewhere for repairs.
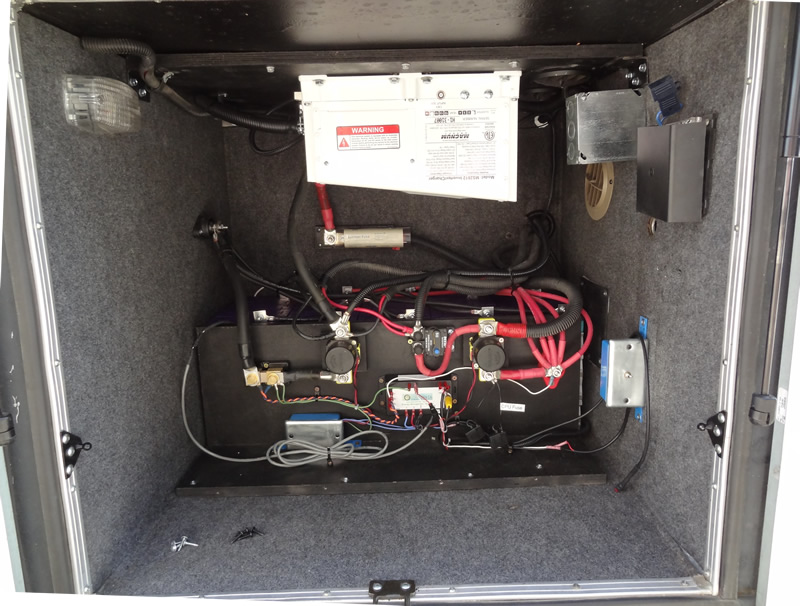
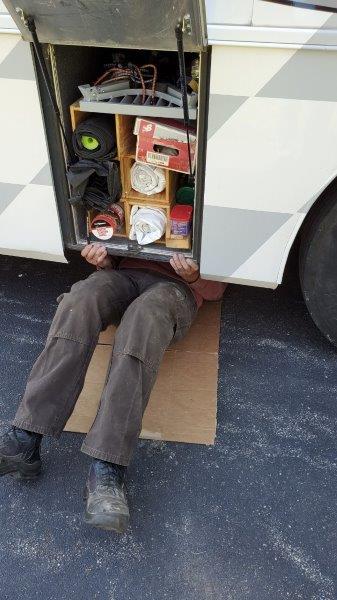
The final plan was to check/clean all the connectors between the boards. There are four cells to a battery with individual sense boards. These four boards come soldered together with ribbon cables. The first and last boards have connectors to allow daisy-chaining to other batteries in the bank as the boards use a serial communication protocol. The very first board connects to the computer. But as I said, the boards were not visible, some were against the back wall of the compartment, the ones on the front were behind a board that mounted the computer and the rest of the controls. But there was about a 1/4″ gap at the front and back. So I went on a fishing expedition. Of course this fishing expedition required mirrors and a borescope. Why? Because the batteries are located such that you can get your hands over them but that’s it. So I had to do all the work “one step removed” looking into mirrors or the borescope display.
Fun, huh? I was able to get the interconnect cables between the boards fished up to above the batteries where I could see them. Then I opened them, cleaned them, and reconnected them. Leaving them up where I could see them for future inspection etc.
So final plan is to go with the cleaned connections and if worst comes to worst, override the system and control it manually.
BUT!
As we were fighting these battles suddenly the solar charger would fully charge the batteries, then enter a P05 state and not start recharging as the batteries dropped. What??? How??? Now I’m not only talking to the solar installer but working with Magnum (the builder of the solar charge controller) as the installer had never seen a P05 state before. The good news is this problem only took a few days to figure out. -Somehow- changing the charging parameters in the inverter/charger to run the battery tests had changed/reset/overwrote a setting the triggers the solar charge controller. The solar charge controller would eventually have started recharging the batters but not until their SOC was VERY low. Not good, so change the setting and things seem to be back to normal. Never did figure out how that setting got changed, Especially since that setting was several menu layers lower than any of the settings I changed and I had never been that far into the menu system.
BUT!
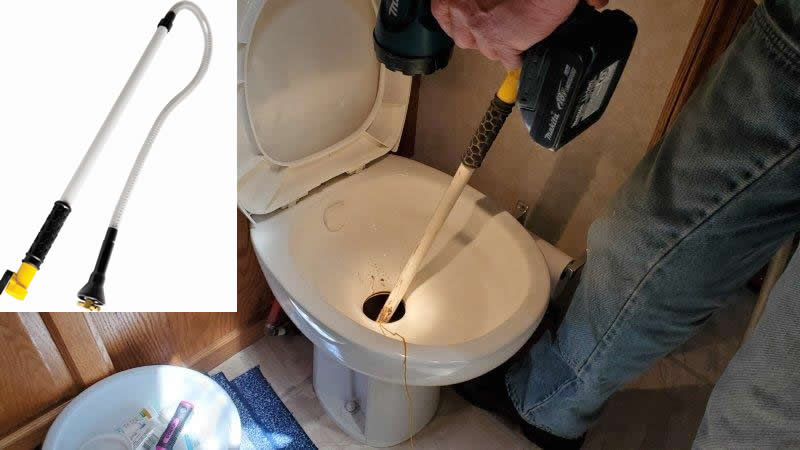
Before any of this started I had several known problems that needed work. One of the dump valves had started leaking around the metal rod that connects the handle to the actual valve blade. So it would only drip while I was dumping gray water but not any time else.
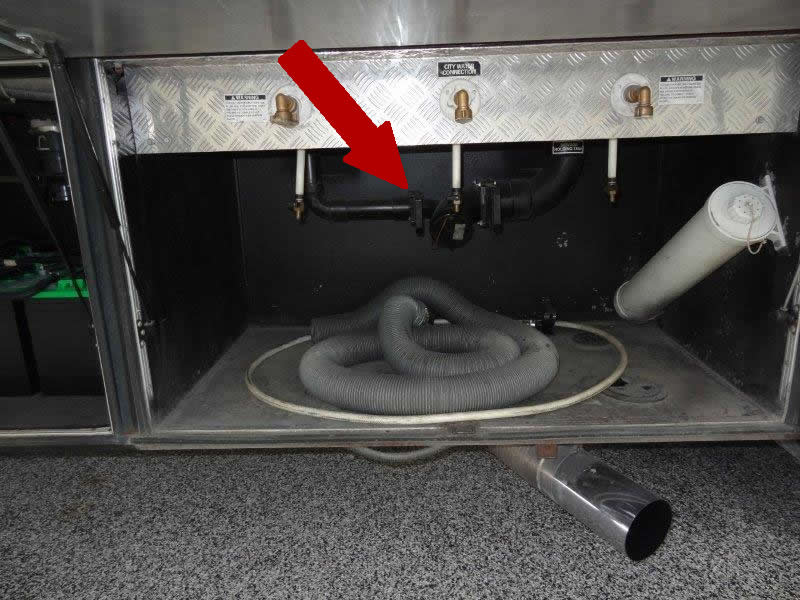
So I knew this had to be done, and it is a normal maintenance procedure for older RVs. After some internet research I learned the seal around the shaft is not a replaceable item. Plus I wanted to replace the blade seals while I had everything apart. But further research indicated the seals had to match the valve type or they wouldn’t work. So simple solution. Replace the entire valve as it comes with new seals and would also fix the shaft seal problem. And the valves are not expensive so it was an easy decision.

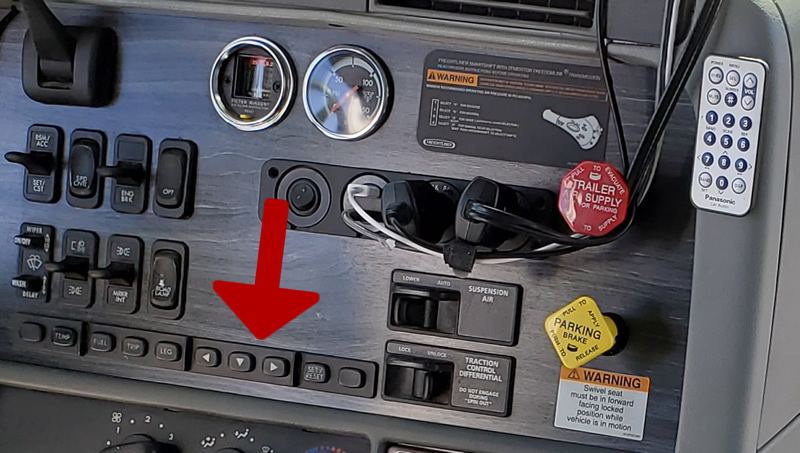
The second issue was on the dash. I have an eight switch array that controls many things. From the trip odometers to the diagnostic screens to the engine information etc. The switches were starting to stick and/or not make contact when pressed. Remember this is a 16 year old truck. But since it is a truck, we called Tracy Road Equipment, the local (to home) Freightliner dealer, gave them the VIN, presto… switch array on order.
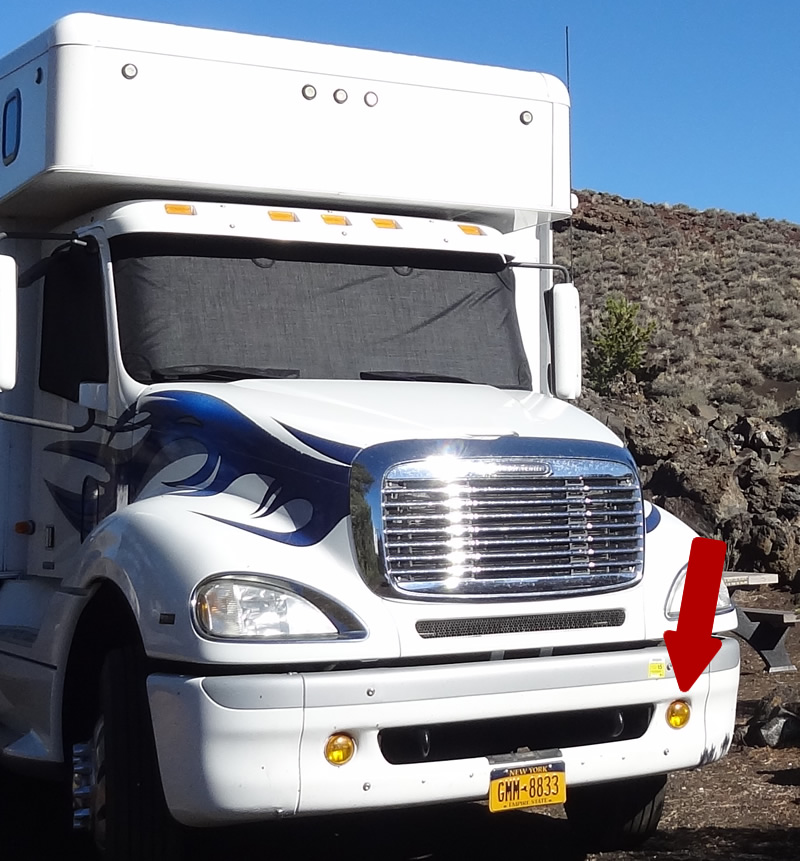
Plus we ordered a new running light. Why? On the way home a truck in the other lane exploded a tire and sent shrapnel all over. A big chunk hit the running light in the front bumper and knocked it completely out.
So while running the tests of the battery system to try to pinpoint the failure I had plenty of time to work on other things. First order of business was the dash switch array. Here we go again. Did I say dash? Remember the pictures from when I had to replace the air switch? You guessed it. Back into dash deconstruction mode. Fortunately I didn’t have to remove quite as many pieces this time. Since replacing the switch was one of those tasks that would require more than two hands I had my friend Dave help. (Corinne says “Thanks Dave!”)
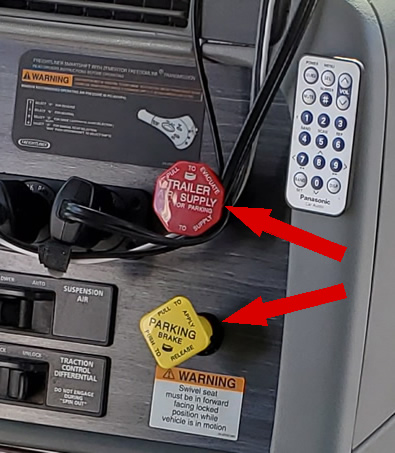
The switch replacement went better than anticipated. Then dash reassembly time. Good to go. So we are going to go to local RV dealer to dump and flush the tanks prior to working on the valves. Since I need to work on one valve I figure I may as well replace them all. The others are probably just waiting to fail. Start the truck, get ready to go, disengage the parking brake. Nothing happens and there is a massive air leak under the chassis with a small air sound behind the dash. So the part of the dash that contains the switch array also contains the trailer brake control (black lever), trailer air supply (red push/pull button), and the parking brake (yellow push/pull button). All of these controls hook directly into the air brake system, meaning the air lines are routed to the dash. This is done for simplicity and reliability of the brake system. They don’t want any electronics or computers in between that could fail and make the brakes inoperable.
So we figure we caused a problem when we had the dash apart. Dash disassembly time. Again. I’m getting good at this. Get everything apart and we can not find any problems. We do determine that air sound in the dash was a large quantity of air flowing through the control valve indicating the downstream system it should control is not working. Causing the air leak under the chassis. Time to start learning more about air brakes.
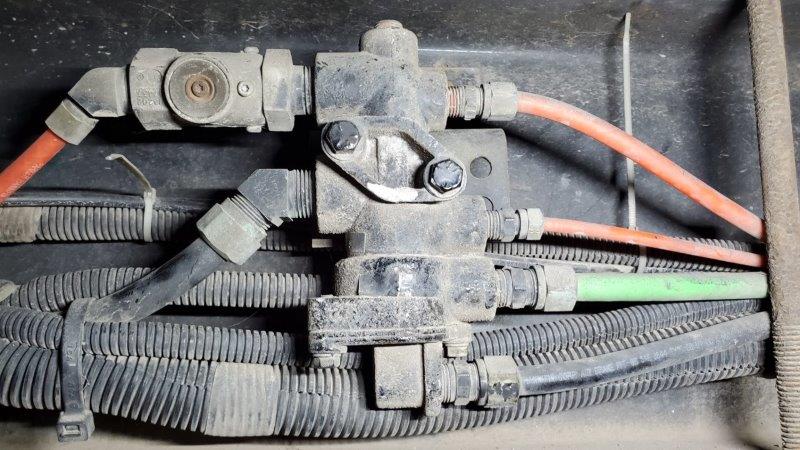
Condense again. After lot of trips to the RV (remember it is parked at our friend Mary Ellen’s place) and many hours on the internet I now know about 1000% more about air brakes than I did before. And I started out with a fair knowledge. Finding where the air was leaking was easy, but why was it leaking? This involved tracing lots of air lines under the chassis, finding the components they were hooked to, cleaning them (remember 16 years of dirt and road grime), then doing internet research to figure out what the part was and what it did.
Back story. Our RV/truck chassis was built to be able to pull a trailer equipped with air brakes (since they didn’t know what the chassis was going to be used for). This puts lots of extra pieces into the air brake system. Including valves and lines to go to the glad hands. If you don’t know about glad hands those are the special connectors that are used to hook a semi tractor to the trailer (or rail cars together). They provide the air to the trailer and are designed to automatically disconnect if the tractor and trailer decouple. But since our truck was delivered as a bare chassis there was no place to mount the glad hands so the air lines were routed along the chassis and left open for future connection at the point the truck was equipped in its final configuration. But since there was no thought of ever pulling a trailer that needed air brakes the lines were never used and no glad hands were put in place.
Back to the condensed part of the story. Part of the problem was straight forward. When reassembling the dash, we had interchanged the red and the yellow push/pull knobs causing the wrong system to be activated.
OK, but why the air leak? Many many hours later it was determined that the “tractor protection valve” had failed. What is the tractor protection valve? It is a safety designed to disconnect the tractor from the trailer in the event of a massive air leak in the trailer. Giving the tractor control and allowing it to safely stop. Remember those air lines (see above) that were never connected? So to my way of thinking a totally open air line should do a pretty good job of resembling a massive air leak in the trailer. Just what this valve is there for. My guess is that 16 years of unconnected air lines had allowed enough dirt/grim/water/insects/etc. to get in and caused the valve to fail. Simple solution, since the valve is only needed when you pull an air brake trailer, and we never do, disable that system and never need the valve.
Once the brake problem was solved, I was able to move the RV to dump the tanks and replace the tank valves.
So I think that covers my trials and tribulations for the month of May. About half way through, in the midst of all the problems being present and before I started finding solutions, I was ready to take a long walk off a short pier. I know a lot more now than I did on May 1st. Just wish I had not needed to learn it. Especially all at the same time. We got home May 5th. Figured a day or two to make repairs, then take it to storage. We got it to storage on May 27th. All those days in between were me pulling my hair out.
Just writing about it makes me feel like I need a beverage (wink wink).
Hope your May was better than mine. Just waiting for June. Which can’t (I desperately hope) be worse.
Corinne here again. Give yourself a gold star if you got to this point! Kudos to you. Yes, the RV is in storage for the foreseeable future. We might take a Fall trip, we might not. Like everyone else, we are in a wait and see mode. Stay safe.
Whoa!!!! I had to read it 3 or 4 times but I understand completely now — not. 🙂 Were you keeping a journal while tending to all these problems? How did Jim remember all this in such detail? Glad that some of this needed attention towards the end of the trip. The Blue Flame and you need a rest before your next “adventure.”
How did Jim remember all this in detail? It was keeping him up at night. It was all he could think of! That’s how. If the solar had failed while we were boondocking, we could have driven the 45 minutes to the installer. Alas, that was NOT the case. Oh well, Jim is soooo much smarter now.
WOW! After just reading this I need a drink. Quite the ordeal! Once again, slow and steady….Hopefully this is information that can be stored away for a long, long time!